Creating a Side-by-Side “Collage”
As with all editing; from your uploaded “Copied” originals select the first of the photographs to open.
- Right Click
- Select “Open With” “Paint Shop Pro X2”
Step 1 - Opening All Images
Open all images simultaneously in Paint Shop Pro x2.
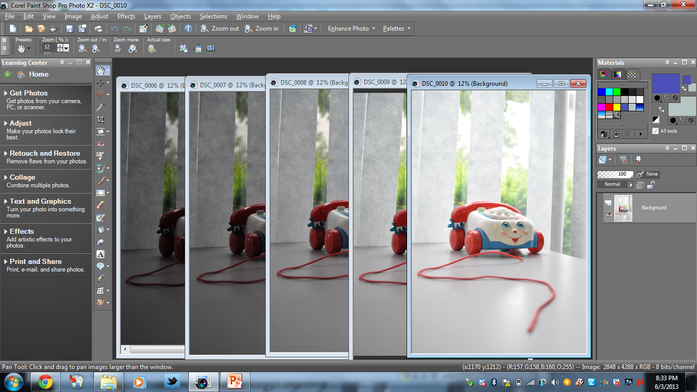
All images opened in Paint Shop Pro Photo x2.
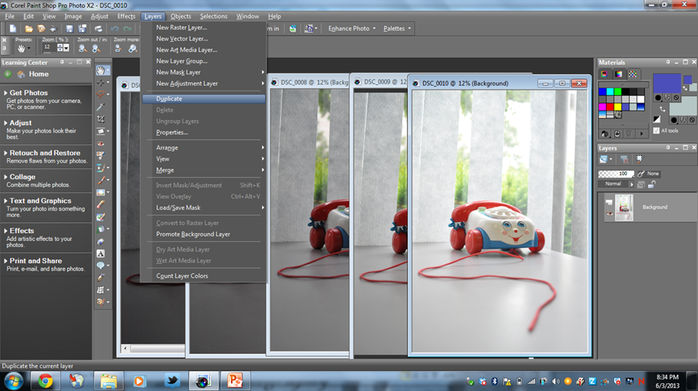
Step 2 - Make Duplicates of Each Image
Even though you are working with copies from your h:drive, taking the time to create a “Duplicate” will save you some headaches later on.
If you make a mistake you can delete the “layer” you make the mistake on and simply restart from the “copy background” or “duplicate”
In Paint Shop Pro Photo x2 the duplicate will automatically be called "Copy of Background."
If you make a mistake you can delete the “layer” you make the mistake on and simply restart from the “copy background” or “duplicate”
- Go to "Layers"
- Select "Duplicate"
In Paint Shop Pro Photo x2 the duplicate will automatically be called "Copy of Background."
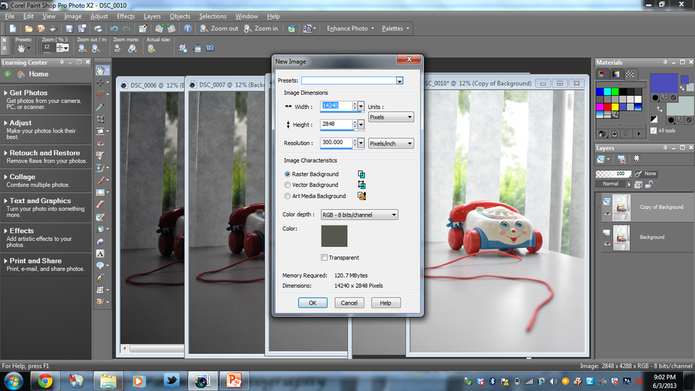
Step 3 - Creating a "New Image"
|
|
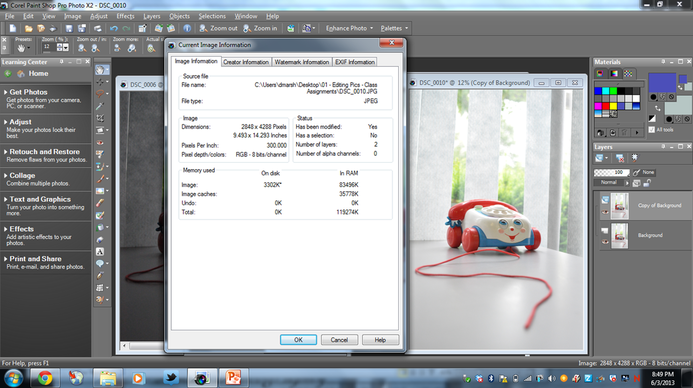
Note: In future, if you create a combination of photos as we are, make sure to look at the information for each of the photographs
Step 4 - Putting it Together In A New Image
- With the information you’ve collected
- Determine which direction you will be combining your photos (horizontally – for portraits or vertically – for landscape)
- Take the dimension you will be combining in (horizontal) and multiply it by 5 (the number of photos you will be combining together)
The other dimensions should remain the same, 4288 pixels in “height” and PPI 300.000
- Go to “File” on the Menu Bar
- Select “New”
- A new window will appear, enter the data information you collected (and determined) into the first three lines
- This information will be the Dimensions for the “New Image”
- When finished click “OK”
|
|
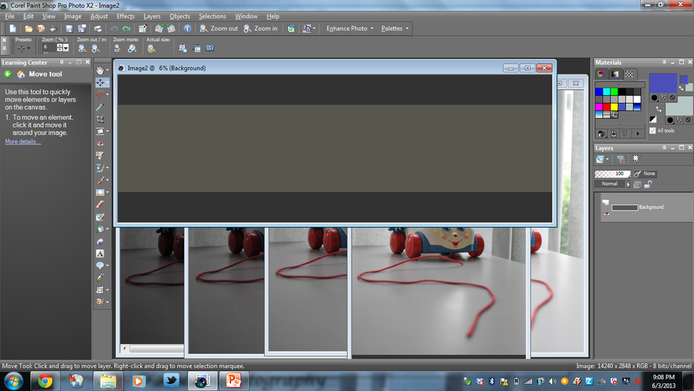
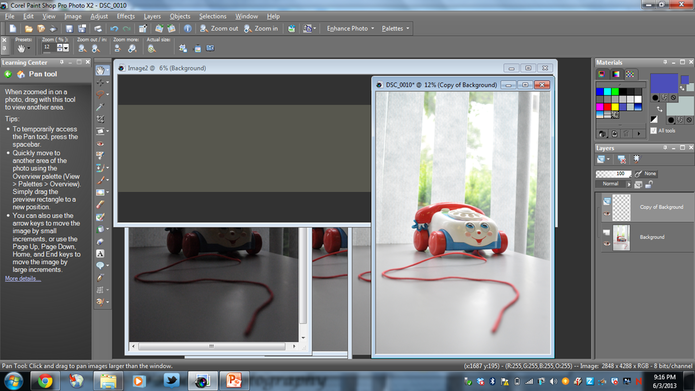
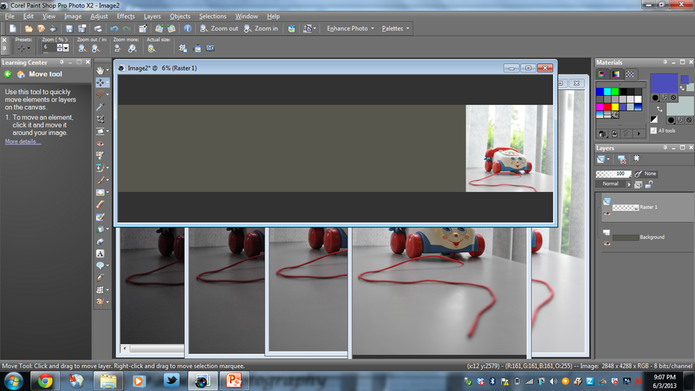
Step 5 - Combining the Photos Into One
|
|
- Continue this process until all 5 photos are pasted onto the “new image”
- You should now have 1 “Background” layer and 5 “Raster” layers
Take the time to make sure they are properly aligned. You can do this using the “Zoom In” and “Zoom Out” Tool with the “Move Tool”
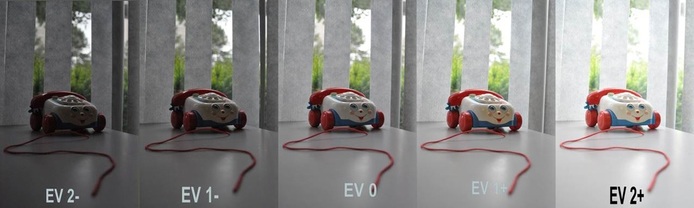
Step 6 - Adding Text to the Image
- Select the “Text Tool”
- In the Tool Bar select “Vector”
- Click on the image, a new window will appear.
- Type in your text “EV 2-”
- Format it as you like, move it to the location you like.
Repeat, once you add in another Vector Text, you will not be able to edit the text before, or may have extreme difficulties.